I’ve been playing around with the idea of sous-vide cooking for some time, but had never tried it.
Sous-vide, (French for under-vacuum) is simply cooking without air — usually at low cooking temperatures, a vacuum sealed bag of food is placed under water and allowed to cook at the desired internal done temperature. Cooking like this prevents any over-cooking throughout the food (think of the steak that’s pink in the middle and well-done everywhere else) and it retains all of the foods natural juices and flavours. The biggest problem for the average foodie is that you need a device called a thermal immersion circulator that costs in the neighbourhood of $1300. The reason you need such a fancy device is because when you’re cooking meat sous-vide, you need to keep your meat at the right temperature to prevent both over-cooking and under-cooking (food poisoning). Because of the fairly narrow temperature window you need something that has the capability to maintain a low stable temperature. But I digest…er, digress…
Eggs are great for sous-vide because they’re already in their own little hard white vacuum packages and the cooking temperatures aren’t critical.
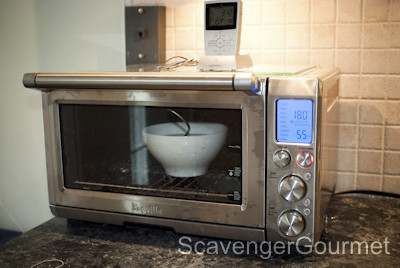
My set-up was simple, an egg in a bowel of water, in my toaster oven, with a temperature probe in the water. Being able to set the oven temperature and monitor the water temperature proved critical. I found that in order to maintain a 150° F water temperature, I had to set the oven to about 210°F. If you have a gas stove, I’m sure you could manage to get the right temperature with a low flame in a regular pot of water, but I’ve got a ceramic cook-top (much to my chagrin!), so stove-top cooking wasn’t really an option. Electric stoves just aren’t stable enough — your temperatures would be all over the place.


